
The most reliable way to define curls at home is to work with soaking-wet hair, seal in moisture with a leave-in, and choose your technique based on your natural pattern. Strong curls respond well to application methods like praying hands or raking, while looser or uneven patterns usually need a set style, such as a twist-out or finger coil, to hold their shape. If you’re ready to start now, apply a leave-in to wet, sectioned hair before you do anything else.
TL;DR:
- Using a leave-in conditioner on soaking-wet hair is essential before applying styling techniques, especially for high-porosity hair that absorbs product quickly.
- Strong, natural curl patterns respond best to application methods like praying hands or raking, while weaker or uneven patterns often need set styles such as twist-outs or finger coils to hold shape.
- Maintaining moisture through proper washing, conditioning, and gentle detangling is more critical for defining curls than product choice alone, especially for fragile, dry, or coarse hair.
- Diffusing on low heat or air-drying helps preserve curl definition and reduces frizz, with finishing touches like scrunching out gel cast or applying lightweight oil enhancing the final look.
- Common issues like flat roots, frizz, or uneven patterns are quickly fixed with simple techniques like root lifting, gentle re-wetting, or combining different styling methods on different sections of the hair.
Table of Contents
- Assess your curl type, porosity and the tools you’ll need
- Wash and condition for curl definition: a moisture-first routine
- Choose a shaping approach: application methods versus set styles
- Step-by-step wet styling routine to define curls at home
- Drying and finishing: keeping definition and avoiding frizz
- Troubleshooting: fixes for flat roots, frizz and uneven pattern
- Salon-grade products that support long-term curl health
- What actually moves the needle for curl definition
- Starter kit from ProHair and where to buy
- Sources
- FAQ
Assess your curl type, porosity and the tools you’ll need
Before you touch a single product, it helps to know what you’re working with. Curl categories generally run from loose waves through to tight coils, and the tighter the pattern, the more moisture your hair tends to need and the heavier the product it can usually handle without weighing it down.
Porosity matters just as much. A quick way to check is the sink or drop test: a strand of clean, dry hair dropped into a glass of water. Hair that sinks quickly is usually high porosity and drinks up product fast, while hair that floats for a while is low porosity and needs lighter formulas applied in thin layers. You can also just watch how your hair behaves day to day, since slow drying and product that sits on top rather than absorbing are both practical clues.
A few tools make the whole process easier:
- A microfibre towel or hair wrap to reduce friction while drying
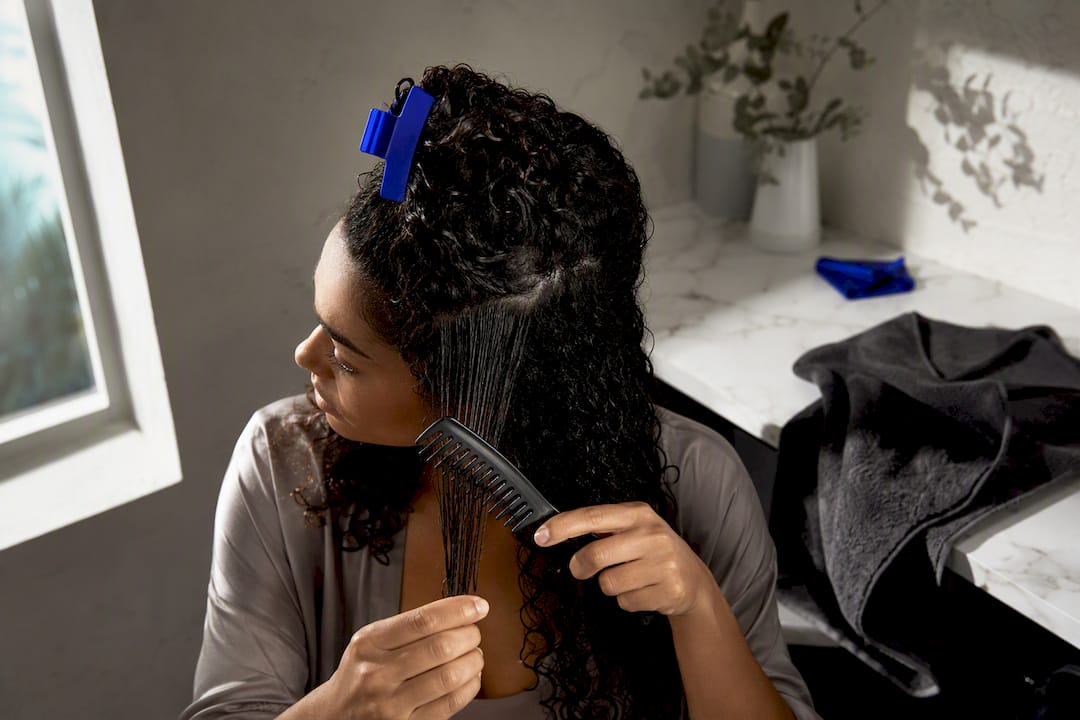
- A wide-tooth comb for detangling in the shower
- A diffuser attachment if you’re using a hairdryer
- A satin pillowcase or bonnet for overnight protection
- Sectioning clips to keep hair organised while you style
As a general rule, a strong natural pattern responds well to application methods, while a weaker or inconsistent pattern usually needs a set style to hold its shape.
Wash and condition for curl definition: a moisture-first routine
Curly hair is naturally drier than straight hair because scalp oil struggles to travel down a winding hair shaft to reach the ends, which is part of why curls arise from asymmetry in the follicle and cortex in the first place, according to a research overview on hair structure. That same asymmetry means curls need more deliberate moisture and gentler handling than straight hair to keep their shape.

Dermatologists echo this. The American Academy of Dermatology recommends a moisture-first approach, with many people needing to wash as little as every 2 to 3 weeks unless styling product build-up calls for a clarifying wash sooner. Conditioning from root to tip matters too, since sebum rarely makes it all the way down the strand on its own.
In the shower, a simple sequence works best:
- Apply a moisturising or clarifying shampoo depending on build-up, focusing on the scalp.
- Follow with a hydrating conditioner, working it through mid-lengths and ends.
- Detangle while the conditioner is still in, using a wide-tooth comb or your fingers, section by section.
- Rinse with cool water where you can, which helps hair feel smoother.
- Squeeze out excess water with a cotton T-shirt or microfibre towel rather than rubbing.
- Apply your leave-in while hair is still soaking wet, before any water evaporates.
Pro Tip: Detangle only when your hair is fully saturated with conditioner. Brushing dry curls breaks apart the clumps that create definition and causes frizz almost immediately.
Choose a shaping approach: application methods versus set styles
Once your hair is washed and conditioned, the next decision is which family of technique to use. Broadly, curl definition falls into two camps: application methods and set styles.
Application methods work with the pattern you already have. Praying hands (smoothing product between flat palms down the length of a section), raking (pulling fingers through wet hair like a comb) and scrunching (cupping hair upward to encourage clumping) are all quick, low-effort moves that suit hair with a strong, consistent natural curl.
Set styles impose a shape rather than enhancing one. Finger coils, twist-outs, braid-outs and bantu knots all take longer to install, sometimes 20 to 40 minutes for a full head, but they hold their form for days and work well even on hair with a weak or patchy pattern.
- Application methods suit strong natural curls and time-poor mornings.
- Set styles suit weaker or uneven patterns, humid weather, or when you need multi-day hold for a formal event.
- Application methods need little daily maintenance beyond refreshing.
- Set styles need patience to install but reward you with longer-lasting shape.
If your pattern looks different from one section of your head to another, you don’t have to pick one approach for your whole head. Mixing techniques by section is common and often more effective than forcing one method everywhere.
Step-by-step wet styling routine to define curls at home
This routine works for most curl types and takes roughly 20 to 45 minutes depending on hair length and density.
- Section your hair into four to six parts while it’s still soaking wet.
- Apply a small, coin-sized amount of leave-in conditioner to each section, distributing it evenly with your fingers.
- For an application method, use praying hands to smooth product down the section, then rake your fingers through to separate and define individual curls.
- For a set style, twist two small pieces of hair around each other from root to tip, or finger-coil single strands around one finger, then pin or clip the coil against your scalp until dry.
- Layer products from lightest to heaviest: leave-in first, then a curl defining cream for shape, then a light gel on top if you want extra hold.
- Scrunch gently from ends toward roots to encourage clumping rather than pulling curls apart.
- Choose your drying method based on time and hair health: diffuse on low heat for faster definition, or air-dry if you’d rather skip heat altogether.
Pro Tip: Work one section at a time and finish it completely before moving to the next. Curls that dry while you’re still fussing with a neighbouring section tend to lose their shape.
Drying and finishing: keeping definition and avoiding frizz
How you dry your curls matters almost as much as how you style them. Air-drying is the gentlest option and suits most hair types when you have the time to spare. Diffusing speeds things up and can boost volume, but it needs a light hand: low heat, low airflow, and a cup-and-lift motion that lifts sections from underneath rather than blasting them directly.
- Air-dry when you have a few hours and want to avoid heat altogether.
- Diffuse on low heat and low speed when you’re short on time.
- Once fully dry, scrunch out any gel cast gently with dry hands to reveal softer, bouncier curls.
- Smooth on a small amount of lightweight oil to add shine without weighing curls down.
- Protect your style overnight with a pineapple, a satin bonnet, or a satin pillowcase to reduce friction.
Sleep care makes a genuine difference here. Dermatologists specifically call out protecting curls at night with satin or silk as one of the simplest ways to preserve definition between styling sessions.
Troubleshooting: fixes for flat roots, frizz and uneven pattern
Most curl problems have a quick fix rather than requiring a full restyle.
- Flat roots: Clip sections up at the roots while drying, or diffuse with your head tipped forward to add lift.
- Frizz: Stop brushing dry hair. Lightly mist with diluted leave-in and smooth a small amount of gel over the frizzy areas, or re-wet and re-scrunch if it’s early in the day.
- Crunchy or stiff cast: Scrunch it out slowly with a drop of oil on your palms rather than pulling at it, which softens curls without breaking their shape.
- Uneven pattern across the head: Use a set style like finger coils on the weaker sections and an application method on the rest, rather than forcing one technique everywhere.
Frizz often comes down to how curls are handled once dry, not the products used. Hair structure research points to brushing dry curls as a direct cause of broken clumps and frizz, since it physically separates the strands that give definition its shape.
For readers with tighter, coilier patterns, a wash and go routine built for 4C hair offers useful troubleshooting specific to that texture.
Salon-grade products that support long-term curl health
Curl definition holds up better over time when the products behind it are actually formulated for moisture retention rather than just hold. Practices built around moisture, gentle detangling and protective styling are specifically recommended for tighter, more fragile curl patterns by DermNet NZ, and the same principles apply to looser curls that are dry or damaged.
A simple starter kit covers most of what a curl routine needs:
- A hydrating shampoo suited to your scalp and wash frequency
- A rich conditioner or deep conditioning rinse for high-porosity or very dry hair
- A leave-in for detangling and daily moisture
- A curl defining cream for shape without crunch
- A microfibre wrap to cut down drying time and frizz
When choosing products, hair type is the main guide. Finer or looser curls generally do better with lighter formulas, while coarser or coilier hair can usually take richer creams and oils without going limp. Ingredients worth looking for include glycerin for hydration, fatty alcohols for slip during detangling, and light film-forming polymers for hold that doesn’t turn stiff.
What actually moves the needle for curl definition
Most curl advice online focuses on products, and products matter less than people think. The bigger decision is whether your hair needs enhancement or imposition: whether you’re working with a pattern that’s already there, or building one that isn’t.
That single choice, application method or set style, does more for your results than swapping one gel for another. A lot of people cycle through products for months without realising their real problem is technique mismatch: using a quick five-minute raking method on hair that actually needs a twist-out to hold shape, or spending 40 minutes on finger coils when their pattern was strong enough to define in a tenth of the time.
Moisture is the other piece that gets underrated. It’s less exciting than a new curl cream, but dry hair won’t hold definition no matter which technique you use. If you only fix one thing this week, fix your wash and conditioning routine before you touch a styling product.
— Burgs
Starter kit from ProHair and where to buy
Getting the technique right matters, but it only works as well as the products behind it. Salon-grade formulas built for exactly this kind of low-manipulation, moisture-first routine are suitable for this purpose, often sourced from brands used in professional salons rather than adapted from mass-market lines.

A practical starter kit for defining curls at home includes:
- A hydrating cleanser from the shampoo and conditioner range
- A repair treatment from the treatments collection for drier or higher-porosity hair
- A curl cream or light gel from the styling and finishing range
- A microfibre wrap or curl brush from the accessories range
Orders over a certain amount may qualify for free shipping, making it worth considering building out a full kit in one go. Browse the full range at ProHair and put together the combination that suits your curl type and porosity.
Sources
- Curly hair care | American Academy of Dermatology (AAD)
- What makes hair curly | EPM (Stanford research overview)
- Hair care practices in women of African descent | DermNet NZ
FAQ
How do I define my curls at home?
Work on soaking-wet hair, apply a leave-in in sections, then use either an application method like raking for a strong natural pattern or a set style like a twist-out for a weaker one. Dry with a diffuser on low heat or air-dry, then scrunch out any product cast once fully dry.
Is ProHair a legitimate brand?
ProHair sells salon-grade haircare products sourced from brands trusted by salon accounts, delivered direct to customers rather than sold only through professional supply channels. Its range covers shampoo, conditioner, treatments, styling products and tools rather than being a single standalone product line.
How can I define my natural curls?
The most reliable approach is moisture first, then styling on wet hair rather than dry. Choose an application method if your pattern is already strong and consistent, or a set style like finger coils if it’s patchy or loose, since set styles impose shape rather than just enhancing what’s there.
Why can’t I define my curls?
The most common causes are brushing hair dry, which breaks apart the clumps that create definition, and not applying enough moisture before styling. Using the wrong technique for your pattern, such as a quick application method on hair that needs a set style, is another frequent reason curls fall flat.